Pip-Boy 3000 Mk V - Developer Documentation
PLEASE NOTE: This is unofficial documentation of The Wand Company’s Pip-Boy 3000 Mk V. For all official documentation and support please refer to the official manual over at https://www.thewandcompany.com/pip-boy-manual.
The Wand Company’s PipBoy 3000 Mk V is a wonderfully hackable little device which the devlopers have made very easy to people to add their own apps to and make it truly your own.
Creating your own apps
User created appears appear under their own sub-menu under INV > APPS. Any .js file added under the USER/ directory on the SD card will appear in this menu and can be loaded by pressing the side wheel.
To get started with creating apps you first need to get at the micro SD card inside the device. I covered some of the device disassmbly in my log entry Deeper dive into PipBoy 3000 Mk V hardware. I’ve also found it quite useful while working on writing apps to use a Micro SD extension cable to make it easier to move the SD card between my computer and the PipBoy.
Development environments
To simplify testing and development of apps there’s a couple of approaches you can take, the easiest to get started with is to use the Espruino IDE. Connect the Pip-Boy up to your computer the same way you would do the official updates and visit the above linked IDE, on there click the Connect icon in the top left and select “Web Serial” and then select the Pip-Boy to connect to. Using the console in the left of the IDE you can enter commands and interract with the device live.
NOTICE! In the Espruino IDE take great care not to hit any of the “Send to Espruino” icons in the center as you can inadvertently overwrite the firmware already on your device.
If you’re already somewhat familiar with software development, there’s also a plugin for VSCode for Espruino for connecting to your device from VSCode, or alternatively for an even more simple approach, open a direct serial connection to the USB serial port, there are more options and details available in the Espruino Quick Start documentation.
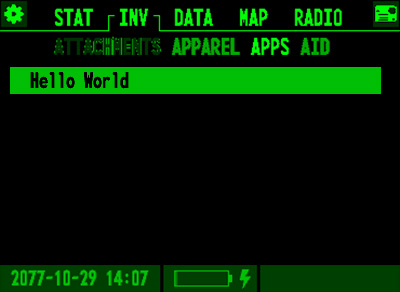
Hello World
This basic “Hello World” app demonstrates how to load an app and print something on the screen. On the SD card create a new text file under the USER directory named helloWorld.js and enter the following:
// Print "Hello World!" on the screen, then 3 seconds later, print some more text.
Pip.typeText("Hello World!").then(() =>
  setTimeout(() => {
    Pip.typeText("Nice app!").then(() => {
      setTimeout(() => {
        // 3 seconds after that, return to the apps menu
        submenuApps();
      }, 3000);
    });
  }, 3000)
);
Insert the SD card back into the PipBoy, I usually at this point also reboot it for good mesaure to ensure it reads the SD card. You should now see a new menu item in the apps menu named helloWorld and selecting it should start the app.

APPINFO
You can also have the app name different to the file name, the below id of helloWorld would map it to an app at USER/helloWorld.js. The name that’s rendered in the UI menu now matches the name in the file which would be saved at APPINFO/helloWorld.json.
{
  "id": "helloWorld",
  "name": "Hello World!"
}
NOTE! The name of the file in
APPINFOdoesn’t matter, it’s theidin the file that matches it to the app inUSER, but it’s worth keeping it the same to keep things logical.
Storage
The built in SD card is a 256MB FAT16 formatted card. This can be replaced though.
Upgrading the SD Card
Storage on the SD card is accessed via the Espruino fs Library which states that in will interface with a FAT32 filesystem on an SD card. You can take a larger SD card, format it as FAT32 and then copy all the files from the built in SD card onto a new larger one and everything appears to work perfectly normally. I tried this with a 16GB SD card and it works completely fine playing a 300MB .wav file, see more about that below in Playing Your Own Audio Files.
Graphics
A lot of the documentation around how the Graphics class works and how things are rendered to screen is best described by the Espruino documentation about the graphics library here.
Here though I will cover the implementation specifics for rendering things on the PipBoy specifically.
Buffers
The contents of the PipBoy display is rendered via 3 different buffers, there is one main Graphics instance a g which is the whole screen and then the buffers render content to various parts of the screen.
bH |
Page Header. This holds the menu and submenu for navigation in the top portion of the screen |
bC |
Main page content. The main content pane that resides in the space between the header and the footer. |
bF |
Page footer. The bottom portion of the screen that contains the date/time, battery status etc. |
Each of these buffers is an instance of the Graphics class and inherits the methods of it. So if you wanted to for example clear the main page content you could use bC.clear().
Display Bounds
As the physical display is actually larger than the opening in the PipBoy case you may find that if you render something at 0,0 you won’t see it as it’ll be physically behind the display shroud.
There is a global variable BGRECT that specifies the bounds of the bC buffer, but you can also use g.getModified() while the system is freshly booted to see the range of pixels that get modified, using a combination of this and trial an error I’ve worked out that the bounds that get the most coverage while maintaing reasonable aspects is:
{ x1: 38, y1: 0, x2: 438, y2: 320 }
This gives us an area that’s 400px wide by 320px high. You can confirm this by drawing a rectangular outline with those bounds with g.clear().drawRect(38, 0, 438, 320) and you should see the outline just touching the sides of the physical housing.
Custom Buffers
I’ve found it quite useful to create my own graphics buffer for my apps to offer some more control over how and when things are rendered. To do this you can create a buffer that fits within the bounds specified previously.
// Buffer is created 400px by 320px, 1 bit per pixel
let bX = Graphics.createArrayBuffer(400, 320, 1, { msb: true });

// Make sure the buffer is empty and then draw an outline of a rectangle to
// fill the buffer, with 20px of margin around each side
bX.clear().drawRect(20, 20, 380, 300);

// Draw a Vault-Tec logo in the middle of the screen
drawVaultTecLogo(200, 110, bX);

// Clear the screen first, then we draw the buffer into the screen, top left
// pixel is at 38,0
g.clear().drawImage(
  { width: 400, height: 320, bpp: 1, buffer: bX.buffer },
  38,
  0
);
Changing the UI color
It is possible to change the UI color as a one off.
var pal = [
  new Uint16Array(16),
  new Uint16Array(16),
  new Uint16Array(16),
  new Uint16Array(16),
];
// Orangey
for (var i = 0; i < 16; i++) {
  pal[0][i] = g.toColor(i / 15, i / 30, 0); // 0: even (bright line)
  pal[1][i] = g.toColor(i / 30, i / 60, 0); // 1: odd (dark line)
  pal[2][i] = g.toColor(i / 10, i / 20, 0); // 0: even scan effect
  pal[3][i] = g.toColor(i / 20, i / 40, 0); // 1: odd scan effect
}
Pip.setPalette(pal);
Screenshots
For some of the demonstrations in this page I wanted to add screenshots, there are various ways to capture this but the way I used was to dump the buffers into a file on the SD card, the example below dumps the main content buffer into a bitmap file under the directory “SCREENSHOTS”.
require("fs").writeFile("SCREENSHOTS/screenshot.bmp", bC.asBMP());
Audio
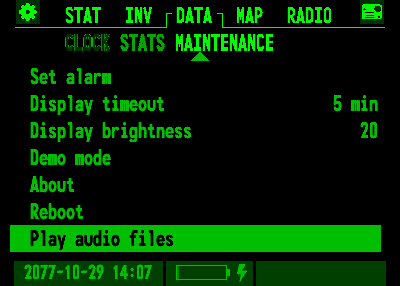
Play your own audio files
You can play your own music and audio, but first any files you have must be converted to 16-bit mono channel wave files before they’ll play, this can be achieved easily using ffmpeg.
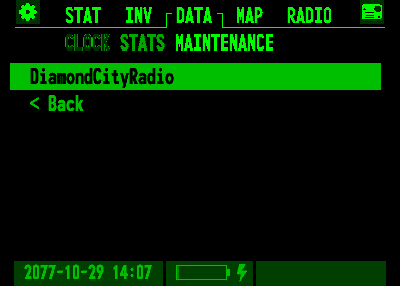
Example:
ffmpeg -i DiamondCityRadio.ogg -ac 1 -ar 16000 DiamondCityRadio.wav
-ac 1 Sets audio channels to 1.
-ar 16000 Sets audio sampling rate to 16kHz.
Files should be placed in the USER/ directory on the SD card. Now in the DATA > MAINTENANCE menu, at the bottom is an option to Play audio files, all your .wav files should appear in here.
Video
Like with the audio mentioned previously, you can also play your own video files providing they’re the correct format.
Play your own video files
To play video on the PipBoy, the video must be a vids video stream type, 8 bit color depth. I also found that 12fps and if there’s audio, the lowest bitrate you can get away with. As with the audio files, video files are placed in the USER/ directory and must have the .avi extension.
Example:
ffmpeg -i my_video.mp4 -vf "scale=400:-1,format=rgb555le" -r 12 -c:v msrle -pix_fmt pal8 -c:a pcm_s16le -ac 1 -ar 11025 mv_video.avi
-vf "scale=400:-1,format=rsb555le" Video filtering, the first option scales the video, in this case I scaled it to be 400px wide. Also changing the format to RGB555 little endian, not sure this is entirely crucial.
-r 12 Set the framerate to 12 fps.
-c:v msrle Set the video codec to use Microsoft Run-Length encoding.
-pix_fmt pal8 Change the pixel format to 8-bit color depth.
-c:a Set the audio codec to PCM, this is only really relevant if your video has audio.
-ac 1 Force the audio to be single channel mono, the video won’t play if it’s stereo audio.
-ar 11025 Sets the audio sampling rate to 11kHz.
Inputs
The main Pip object has events for most of the physical controls, you can add and remove listeners to these events for adding input control to your apps.
| Event | Control | Parameters |
|---|---|---|
knob1 |
Left side knob | -1 Clockwise rotation, 1 Counter-clockwise rotation, 0 button press |
knob2 |
Top knob | -1 Clockwise rotation, 1 Counter-clockwise rotation |
torch |
Top button | - |
Example
An example implementation of using the left knob.
// Remove any existing listeners so ours is the only one
Pip.removeAllListeners("knob1");

// When left knob is rotated or clicked, log the event
Pip.on("knob1", (d) =>
  d !== 0 ? console.log(d > 0 ? "Up" : "Down") : console.log("Clicked")
);
Modules
Espruino supports loading modules (or libraries) for reusable code, there are also a selection of modules ready for use on Espruino published that can be quite useful on the PipBoy https://www.espruino.com/Modules#existing-modules.
Loading Modules
The best way I’ve found for making use of these modules is by loading them from the SD card when required. I created a directory on the SD card named MODULES, minified versions of the modules can be downloaded from http://www.espruino.com/modules/ (they’re the ones named .min.js) and then added to the MODULES directory on the SD card. Using the minified versions will help to reduce the memory usage when loading the module.
To make use of the modules in your own code, you first must add the module to the cache and then you can require() it as normal, example:
Modules.addCached("Cron", require("fs").readFileSync("MODULES/Cron.min.js"));

require("Cron");
As a best practice and to conserve memory, it’s also worth removing the modules from the cache once you stop using them:
Modules.removeCached("Cron");
Running code on boot
For a full run down on how to run things at boot time check out the article Hacking the PipBoy 3000 Mk V Bootloader. But for the short version please continue.
First create the boot loader, this will set your Pip-Boy up to run all .js files from a directory named USER_BOOT on the SD card at startup:
require("Storage").write(
  ".boot0",
  'E.on("init",function(){require("fs").readdir("USER_BOOT").forEach(function(f){if(f.endsWith(".js")){eval(require("fs").readFile(`USER_BOOT/${f}`))}})})'
);
Now any files you create in USER_BOOT will run at next boot, as an example, the following will cause the UI to change to orange instead of green:
require("fs").mkdir("USER_BOOT");
require("fs").writeFile(
  "USER_BOOT/ui_color.js",
  "for(var pal=[new Uint16Array(16),new Uint16Array(16),new Uint16Array(16),new Uint16Array(16),],i=0;i<16;i++)pal[0][i]=g.toColor(i/15,i/30,0),pal[1][i]=g.toColor(i/30,i/60,0),pal[2][i]=g.toColor(i/10,i/20,0),pal[3][i]=g.toColor(i/20,i/40,0);Pip.setPalette(pal);"
);
Default Screens
Each of the standard displays have functions that can be called to render them, this can be useful for example when exiting apps to return to known menus etc.
Main Menu
You can fully render whatever the current default menu should be by calling showMainMenu(), this is particularly useful as part of a function call when exiting your apps.
Sub Menus
Each one of the built in submenus can also be rendered directly by calling one of the appropriate submenu calls.
submenuBlank        submenuClock
submenuRadio        submenuStatus
submenuConnect      submenuDiagnostics
submenuRad          submenuMap
submenuInvAttach    submenuExtTerminal
submenuApparel      submenuStats
submenuAbout        submenuVideos
submenuAudio        submenuApps
submenuSetAlarm     submenuMaintenance
submenuSetDateTime  submenuSetAlarmTime
UI Elements
There are helper functions for rendering some of the standard UI elements.
Message
The message element renders a Vault-Tec logo in the middle of the display with your chosen message underneath.
https://www.espruino.com/Reference#l_E_showMessage
Example Usage
E.showMessage("Hello World");
Menu
Used to present the list based menus like the ones seen in the standard Maintenance pages etc.
https://www.espruino.com/Reference#l_E_showMenu
Example Usage
E.showMenu({
  // Configure a boolean value
  Boolean: {
    value: true,

    // You can use a format function to change how it's presented
    format: (value) => (value ? "On" : "Off"),
  },

  // Set a numeric value with limits
  "Numeric Value": {
    value: 5,
    min: 0,
    max: 10,
    step: 1,

    // Use an onchange function to do something with a new value
    onchange: (newValue, event) => console.log(newValue),
  },

  // Optionally just call a function when pressed
  "Function Call": () => console.log("Function"),
});
Prompt
Prompt the user for an answer to a question.
https://www.espruino.com/Reference#t_l_E_showPrompt
// Basic usage, asks yes or no by default, returns a promise with result
E.showPrompt("Are you sure?").then(console.log);

// Custom usage, change title, buttons and values
E.showPrompt("Choose a prize", {
  title: "Congratulations! ",
  buttons: {
    Stimpak: 1,
    "10mm Ammo": 2,
    Jet: 3,
  },
});
Functions
Pip.isSDCardInserted
Returns true if the SD card is present. Reads SDCARD_DETECT to test presence, an alias of A15.
> Pip.isSDCardInserted()
= true
Pip.getID
Reads the device ID. Device ID is read from memory registers 0x536836624 0x536836632 and 0x536836628.
> Pip.getID()
= "123456Q-12-123B"
Pip.measurePin
Read the average voltage of an analog pin. Used to read the state of the resistor ladder on the mode selection dial.
Parameters
pin Analog pin to read.
samples Number of samples to read. Defaults to 10.
factor Average is multipled by this factor. Defaults to 2.
> Pip.measurePin(MODE_SELECTOR)
= 0.02578289836 // STAT
> Pip.measurePin(MODE_SELECTOR)
= 1.34515215214 // INV
> Pip.measurePin(MODE_SELECTOR)
= 2.67024886699 // DATA
> Pip.measurePin(MODE_SELECTOR)
= 4.01914486189 // MAP
> Pip.measurePin(MODE_SELECTOR)
= 5.34623848015 // RADIO
Pip.knob1Click
Actions performed when the left knob is turned, plays audio clicks from UI/ROT_V_1.wav and UI/ROT_V_2.wav depending on direction.
Parameters
direction Values greater than 0 play audio 1, less than plays audio 2.
> Pip.knob1Click(1)
Pip.knob2Click
Actions performed when the top knob is turned, plays audio clicks depending on direction. Older versions (< 2v24.206) used UI/PREV.wav but newer uses an audioBuiltin.
Parameters
direction Values greater than 0 play audio 1, less than plays audio 2.
> Pip.knob2Click(1)
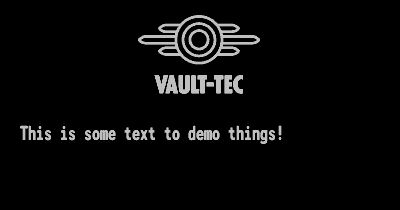
Pip.typeText
Prints text onto the screen, the text has a typing effect and plays sounds and prints character by character below a Vault Tec logo.
Parameters
text Text string to display on the screen.
> Pip.typeText("This is some text to demo things!")
Pip.offAnimation
Plays the screen off animation.
> Pip.offAnimation()
Pip.offOrSleep
Power off or sleep the device, can be configured to play or not play various animation sequences.
Parameters
options Object of options, options include forceOff and immediate.
{
  // If true, at the end of the powerOff animation the device will be turned off, if false it will sleep
  forceOff: true/false,

  // If true, skips playing the fade out sequence etc. and will go straight to the powerOff function.
  immediate: true/false
}
> Pip.offOrSleep({ forceOff: false, immediate: false })
Pip.updateBrightness
Sets the brightness of LCD backlight and all LED’s based on the value of Pip.brightness.
> Pip.updateBrightness()
Pip.audioStart
Start playing an audio file from the given path.
Parameters
path Path to the audio file.
> Pip.audioStart("ALARM/Klaxon.wav")
Global Variables
Hardware Pin References
These values just alias the standard Espruino pin definitions to labels that are easier to reference.
LED_RED = E4;
LED_GREEN = E5;
LED_BLUE = E6;
LED_TUNING = E3;
BTN_PLAY = A1;
BTN_TUNEUP = E1;
BTN_TUNEDOWN = E2;
BTN_TORCH = A2;
KNOB2_A = A10;
KNOB2_B = A8;
KNOB1_BTN = A3;
KNOB1_A = B1;
KNOB1_B = B0;
BTN_POWER = A0;
MEAS_ENB = C4;
LCD_BL = B15;
VUSB_PRESENT = A9;
VUSB_MEAS = A5;
VBAT_MEAS = A6;
CHARGE_STAT = C5;
RADIO_AUDIO = A4;
MODE_SELECTOR = A7;
SDCARD_DETECT = A15;
Fun Notes
Default Date
System date defaults to the date and time the bombs dropped at the start of the Great War.
if (new Date().getFullYear() === 2000) {
  setTime(new Date("2077-10-23T09:47").getTime() / 1000);
}
Factory Test Mode
Holding down torch, play and knob1 will enter factory test mode to test fuctionality.